9 minutes read
This article will be a practical one as I intend to showcase a fully automated setup of Keycloak for local testing. However, unlike so many examples out there, this article aims to deploy a production-level Keycloak deployment that uses a Certificate Manager, Sealed Secrets, and PostgreSQL HA (high-availability variant). The goal is to create a development and test environment that behaves as realistically as possible. To make redeployments as easy as possible, we will provide both a single bash script and Helm charts. It’s up to the user to decide which path is more useful. Helm charts are powerful, but sometimes a simple bash script might be preferred. Whatever path you choose, the base environment for execution will be my miniDevOps Docker image that you can build yourself from here or just pull it from my Docker Hub. miniDevOps is based on Debian Bookworm and contains a multitude of useful DevOps tools like k9s, Helm, Terraform, Kind, kubectl, kube-shell, etc. It also comes with various bash completions preinstalled, so working from the console is really fast.
miniDevOps
I use miniDevOps as a “remote control” that I deploy on various environments like Docker Desktop, remote Kubernetes resources, and others. This image helps me keep all my preferred tools in one place and configured to my taste. However, your preferences might be different, so if you don’t like it, just use any Linux distribution that runs bash or compatible shells. For the rest of the article, I’ll assume you’re using miniDevOps as well. The first thing to ensure is the Kubernetes environment where Keycloak will run. I will use my local Docker Desktop to deploy and execute some commands to create “Kubernetes in Docker” with Kind. To achieve this, we must run the miniDevOps Docker image with the following flags appended:
docker run --rm -it -v /var/run/docker.sock:/var/run/docker.sock --network=host -v ./session:/session -p 443:443 brakmic/devops:latest
Let’s break down the parts of the command to understand it better:
- docker run –rm -it starts a new interactive session
- -v /var/run/docker.sock:/var/run/docker.sock gives the running image the ability to communicate with the Docker Desktop socket located on the host machine
- –network=host lets you access the host machine’s network
- -v ./session:/session is my standard mapping so I can access certain files while in a Docker session (feel free to use another path)
- -p 443:443 will port-forward the future Keycloak instance whose Nginx-Ingress is listening on 443 (and is using self-signed certificates)
- brakmic/devops:latest is the latest available version of miniDevOps
Ok, let’s fire up the Docker image and set up our very own Kubernetes cluster, shall we?
Setting up the Kubernetes Cluster
While in miniDevOps, enter the following command:
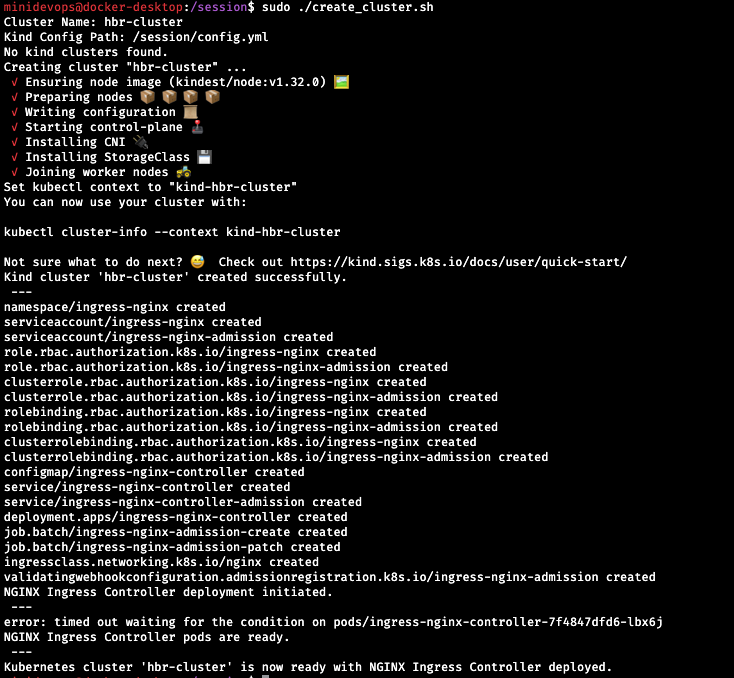
sudo ./create_cluster
The script will use Kind to create a new cluster. Additionally, a new Ingress-Controller will be deployed.
Let’s check the cluster availability with k cluster-info
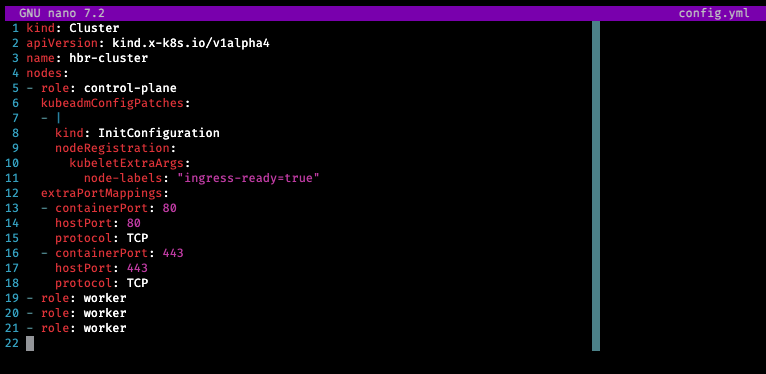
If you want to change the default settings of the cluster, open config.yml with nano.
However, avoid changing the kubeadmConfigPatches unless you really know what you’re doing. These patches are required to provide the ingress controller. In any case, after a few moments, the Kubernetes cluster will be ready. Now, it’s up to you whether you want to keep this cluster accessible for future sessions. If you do, then copy the created $HOME/.kube/config file from your home folder to a persistent volume like the “session” folder I showed earlier. Keeping the config file available allows you to reuse it the next time you start miniDevOps again. Just copy it back to $HOME/.kube/config in the next session, and you will gain access to the same Kubernetes cluster. Of course, if you delete the Docker containers running in your local Docker Desktop, the config file won’t be of much use. So, make sure you don’t delete the containers.
Accessing the Cluster
Try something simple just to see if you can access the cluster. For example:
k get po -Ato list all pods in all namespacesk get deploy -Ato list all deployments in all namespaces
The shortcut “k” refers to the “kubecolor” console tool that adds nice colorization to kubectl outputs. miniDevOps has a few aliases you can check with the “alias” command on the console.
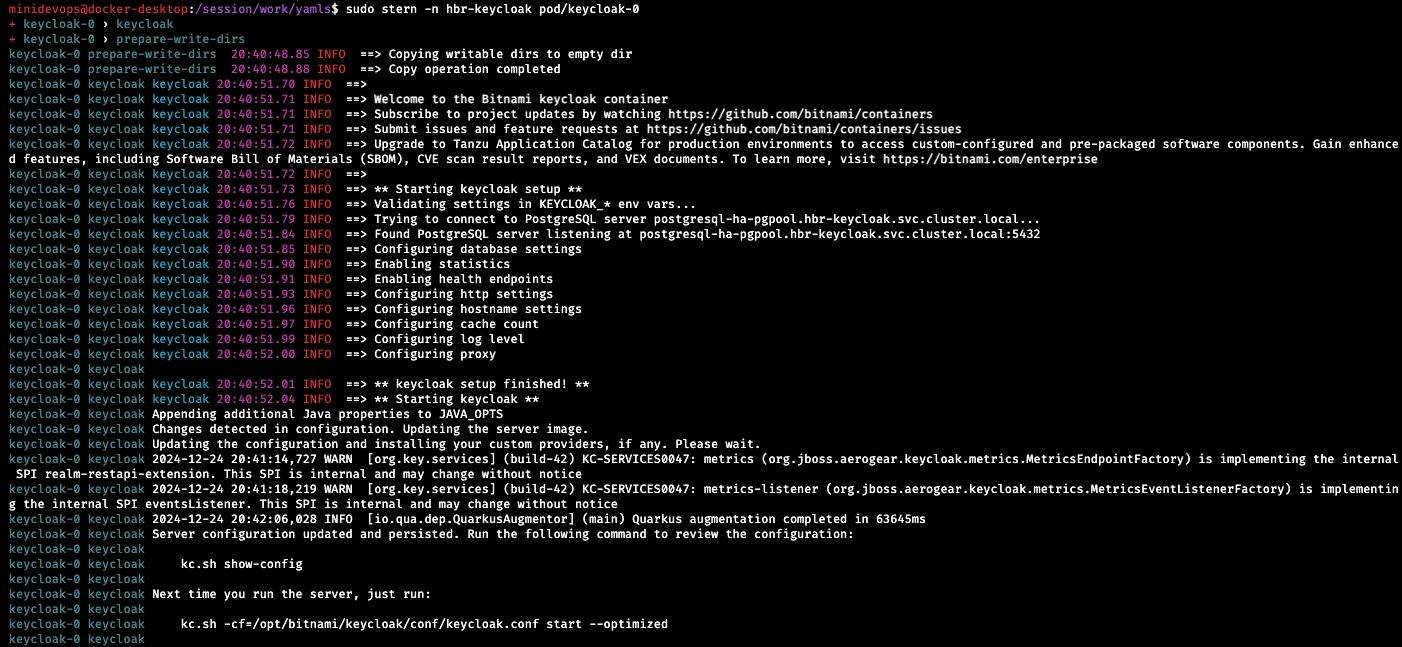
More detailed logs directly from the console are available with the excellent tool called “stern”.
Getting the Keycloak Installation Scripts
Let’s now enter the /session (or your preferred persistent volume) folder and clone this repository:
git clone https://github.com/brakmic/Keycloak_with_PostgreSQL-HA_on_Kubernetes.git work
In case you visited this blog some time ago, the above repo is companion code from an article on Keycloak I wrote earlier. When you enter the “work” folder, you will see several subfolders, of which scripts, yamls, and charts are of interest to us. In “scripts,” you will find these three scripts:
- run_kc_system.sh for unattended deployment of Keycloak and PostgreSQL-HA
- deploy_sealed_secrets_controller.sh for deploying the Sealed Secrets Controller to Kubernetes
- deploy_all_sealed_secrets.sh for deploying sealed secrets for Keycloak, PgSQL, PgPool & RepMgr
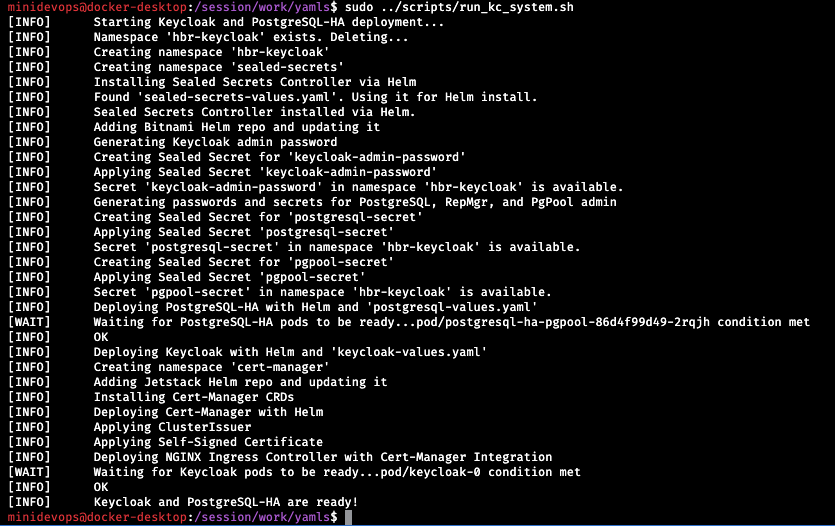
The first script can be considered a “turnkey solution” as it executes every command needed to set up both Keycloak and the surrounding environment. The only flag that can be passed to this script is –debug to activate very verbose output. However, before you attempt to run this script, first navigate to the yamls folder and then execute the script from there:
sudo ../scripts/run_kc_system.sh
This approach allows the script to access all the necessary YAML files that include various options. Now sit back and wait for the installation to complete.
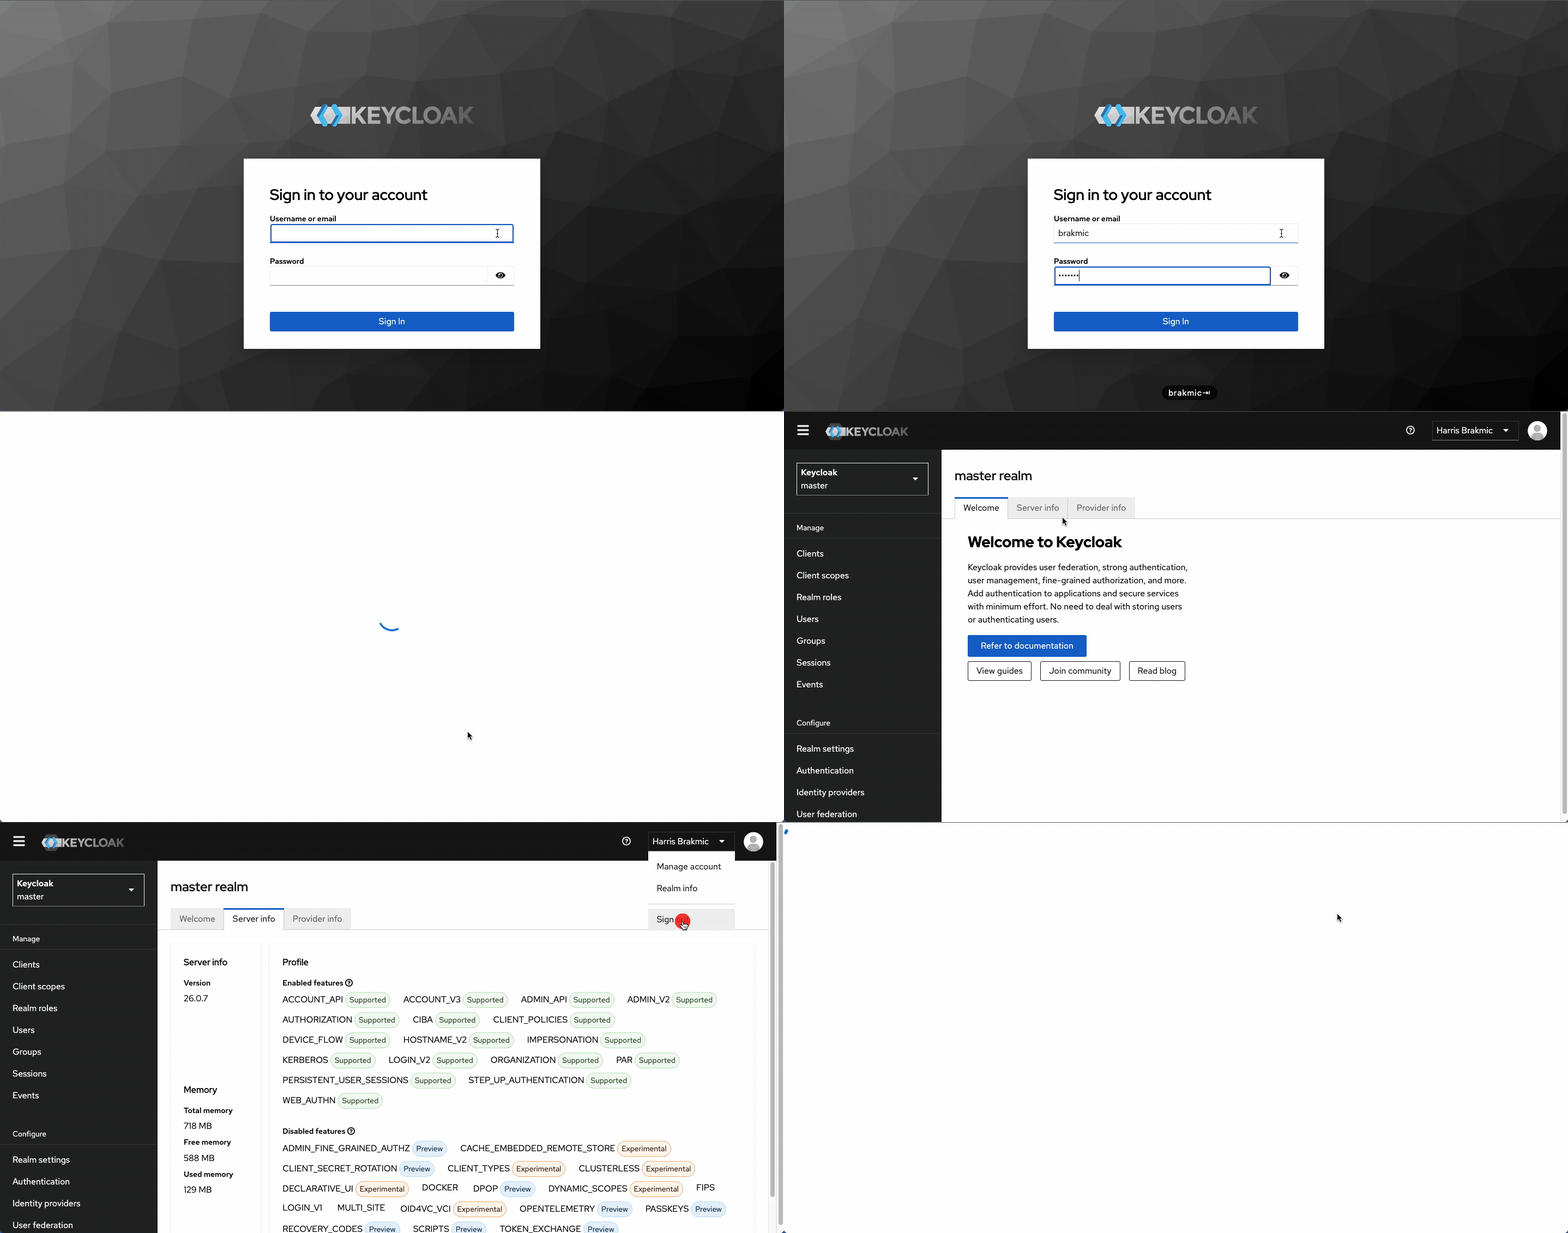
Open https://localhost and enter your credentials to access the Admin Console.
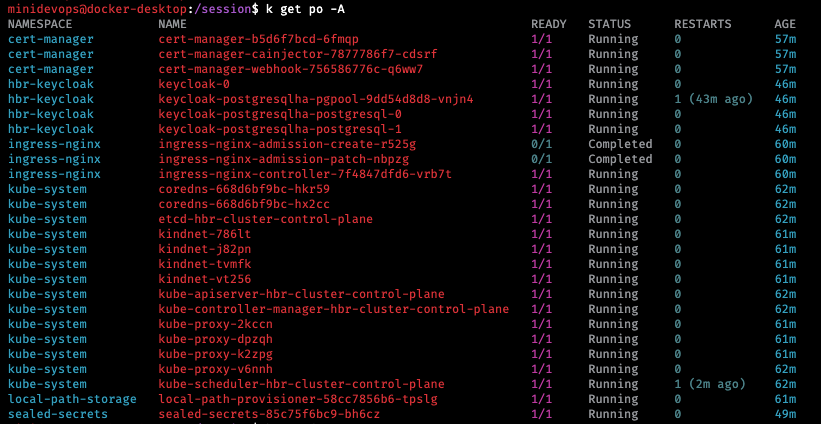
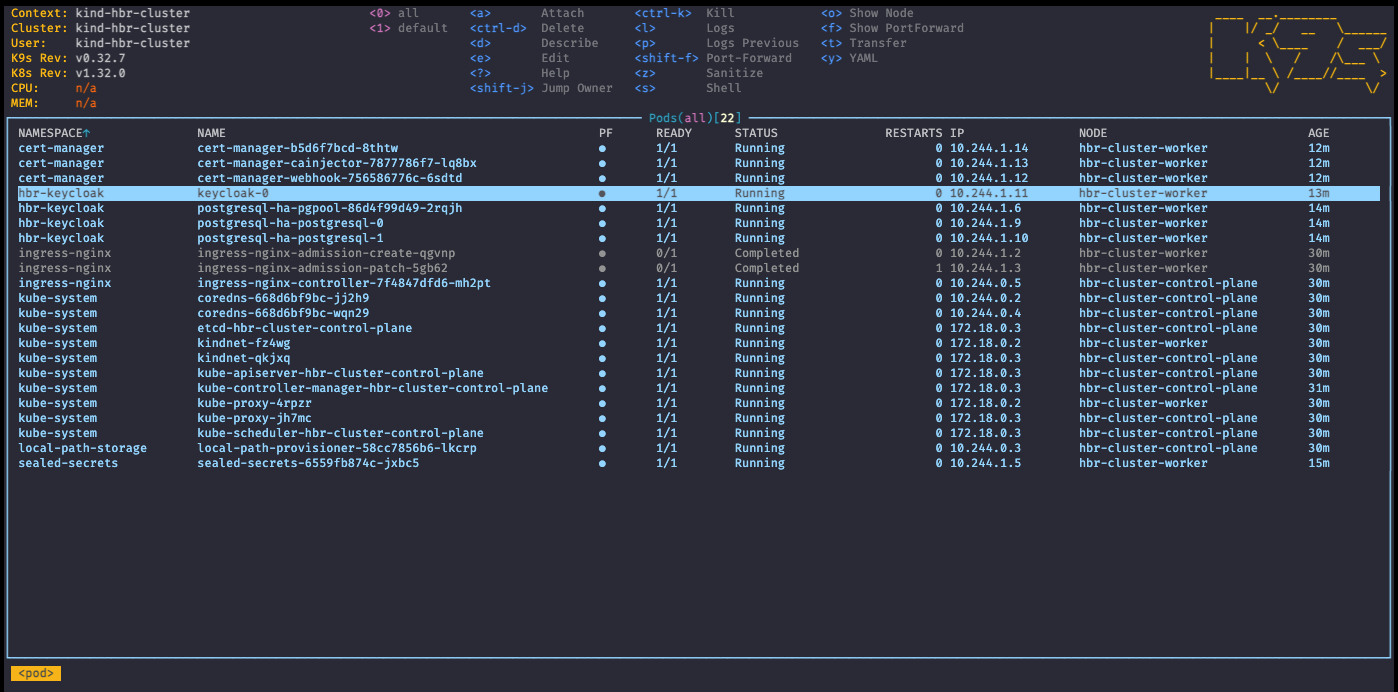
This was rather easy, wasn’t it? A quick check via k9s shows the following instances:
More detailed logs directly from the console are available with the excellent tool called “stern”.
Using Helm to deploy Keycloak
Although deploying with the shell script is relatively easy and ideal for setting up test environments quickly, one should generally always use Helm to deploy complex solutions. The script hides the complexities, but its straightforward approach also conceals useful information and potential changes in deployment settings. Therefore, let’s see how we can achieve the same with Helm. Navigate to the other subfolder called “charts” and list its contents.
We see two chart folders, one to deploy cluster-issuer and the other for deploying Keycloak (iam-chart). Inside each of the folders are the usual template subfolders, Chart.yaml, and values.yaml. As this is not a Helm tutorial, we won’t discuss them in detail. Just know that Chart.yaml defines the “package” and its dependencies that should be installed, the template subfolders contain YAML files for the components the chart includes, and values.yaml contains user-defined data that will be applied at deployment time to modify the behavior of the final result. I recommend analyzing the YAML files for a while to understand the relationships between deployments.
Preparations First
Unlike with the run_kc_system.sh script, we cannot just execute helm install and expect everything to be done automatically. First, we need to prepare the environment (Helm Repos, Namespaces, Certificate Manager, etc.).
Helm Repos:
helm repo add bitnami https://charts.bitnami.com/bitnami
helm repo add jetstack https://charts.jetstack.io
helm repo update
Namespace:
sudo kubectl create ns hbr-keycloak
Certificate Manager:
sudo helm install cert-manager jetstack/cert-manager --namespace cert-manager --create-namespace --version v1.11.1 --set installCRDs=true
Cluster Issuer:
cd cluster-issuer-chart
sudo helm upgrade --install cluster-issuer . --namespace cluster-issuer --create-namespace
…or if you prefer not to enter the chart folder:
sudo helm upgrade --install cluster-issuer cluster-issuer-chart/ --namespace cluster-issuer --create-namespace
Sealed Secrets Controller:
sudo scripts/deploy_sealed_secrets_controller.sh (execute from the root folder)
Sealed Secrets for Keycloak et al:
sudo scripts/deploy_all_sealed_secrets.sh (execute from the root folder)
Finally, we will execute the deployment of Keycloak itself with:
sudo helm upgrade --install keycloak . --namespace hbr-keycloak (inside the “iam-chart” folder)
…or when outside of the “iam-chart” folder:
sudo helm upgrade --install keycloak iam-chart/ --namespace hbr-keycloak
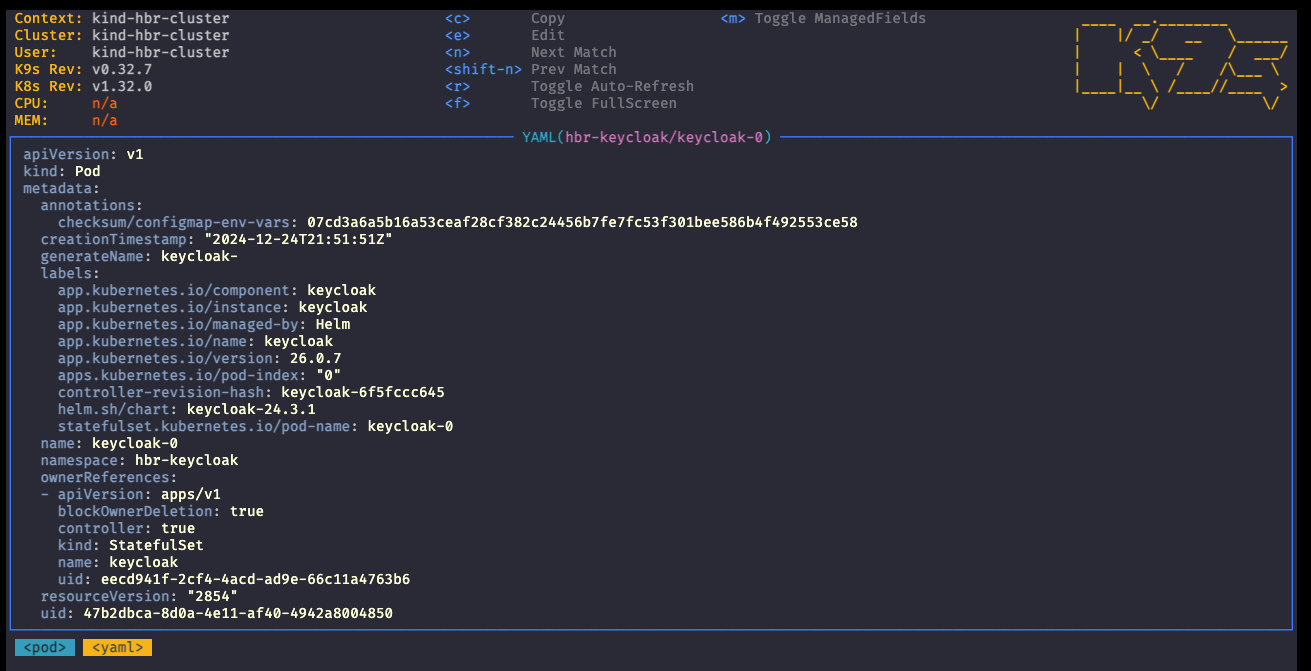
A quick peek into the YAML via k9s shows that this time Helm is managing the Keycloak instance.
Conclusion
I hope that this tutorial will be of some use to people working with Keycloak. The reason I created all this is that I was not very happy with the existing tutorials, which mostly describe bare-bones installations without proper database configuration and no HTTPS while running in dev mode. In some situations, such setups might be sufficient, but Keycloak is a very special software. It’s not merely an IAM solution but an IAM platform. It makes little sense to develop anything related to identity and access management without having HTTPS activated and a proper database running in the backend. Additionally, it is beneficial for developers to delve deeper into the matter and learn what it takes to set up a certificate management mechanism, for example, or to understand the configuration options Keycloak offers.
In any case, have fun with Keycloak!





2 thoughts on “Automating Keycloak Deployments for Fun and Profit”
Excellent based conclusion
Thanks a lot. Glad you liked the article.