5 minutes read
In this article we’ll learn how to use the successors of former Angular 1.x filters: Pipes. As most of us know from own experience the data our apps consume is usually available in various formats that don’t fit very well to our (internal) processes. Also there are situations where we want to check some values first before going any further. And it’s not a big secret that from user’s perspective working with data via complex forms and numerous input fields would quickly become very cumbersome without all those nice little helpers like text formatters, syntax checkers, numeric converters etc. In this article we’ll build a simple Emoji-Pipe that’ll convert the emoji-aliases we type in into real emojis. For example, if we type in :snail: it’ll print out its emoji symbol.
The code for this article is located here.
A demo app can be found here.
Creating a Pipe
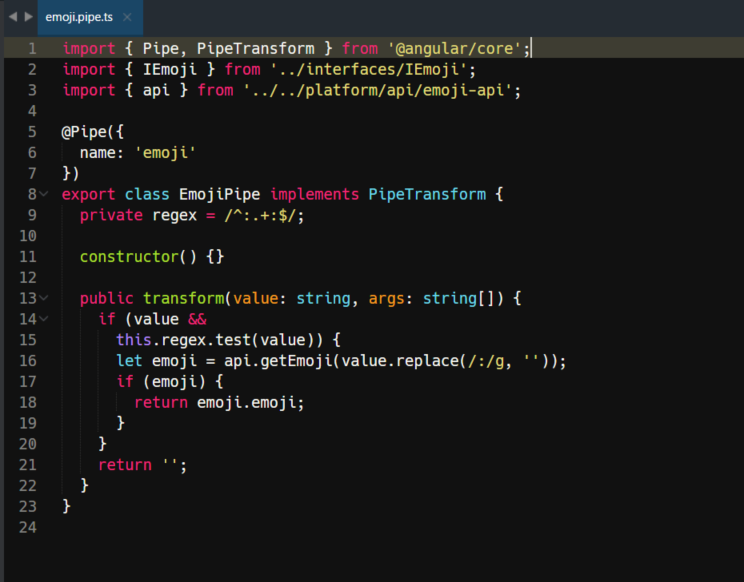
Similarly to a @Component the definition of a Pipe starts with a @Pipe function call which expects a parameter called name. The value in name will later be used in the template where we want our Pipe to process input values. Now let’s define our EmojiPipe:
Together with the mentioned decorator @Pipe we import PipeTransform. This is an important interface because every valid Pipe class must implement it. The only method this interface declares is the transform method that accepts an input value and optional arguments which we could attach to the value (separated by a colon). In our example we’re only interested in the raw value and will ignore any arguments. The Pipe class is just an ordinary TypeScript class and the decorator @Pipe is used to declare it a Pipe together with its new name: emoji. This is the name we’ll use to let Angular know that we want a certain value to go through the pipe. For example: someOriginalValue | emoji. Each time such a value goes through the pipe the transform function will be called. The variable value will provide us the original data that we can manipulate according to some predefined logic. In our case we first test the value against a regular expression. As you may know the emoji aliases are written between two colon symbols, like: 🙂 or :thumbsup:. And becauseour Pipe should be a little more “intelligent” we don’t want it to transform everything we type in but only real emoji-aliases. Just imagine you’re transforming a long text containing many words and some emoji-aliases. A Pipe that simply converts every “smile” or “cat” could produce a damaged document. Therefore we use this simple regular expression to let our Pipe distinguish between emoji-aliases and human-readable words. The next step is the querying of emoji-symbols that goes via the method getEmoji. This method is an export from a helper-API that contains a big array of different emojis provided by a project called Gemoji. I’ve converted the original JSON-object to a JavaScript array and added the helper function getEmoji. The logic and the original License info from the Gemoji project are located under src/platform/api/emoji-api.ts.
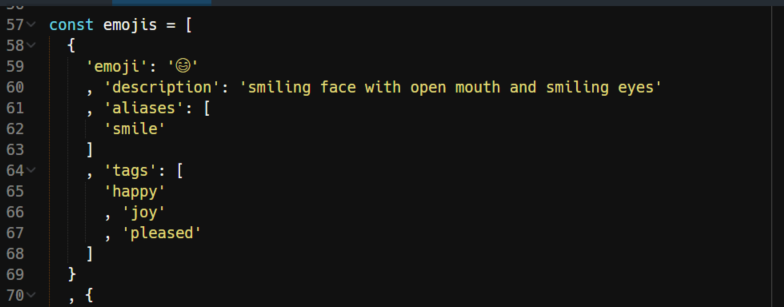
An Emoji-Entry we’d receive from this API would like this:
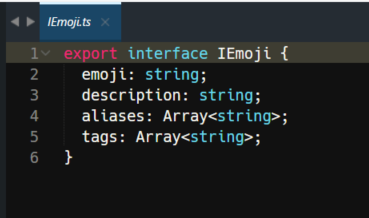
It contains an emoji-symbol, a description and (possibly) several aliases and tags. And because we’re working with TypeScript here we’d like to have such information in a more strongly typed form. Therefore we define an IEmoji interface:
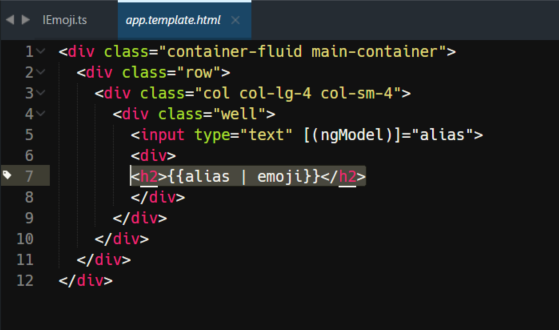
Armored with a proper API and Interface we can now let our Pipe deliver us proper emojis. 😀 But, the question is, where should we let the original data flow into it? The answer is simple: in the template that belongs to the component which controls the data we’d like to transform. In our case this is the main AppComponent and its template is located under src/app/templates/app.template.html
We’ve defined an input field that utilizes Angular’s ngModel directive because we’re interested in two-way data-binding. We’ve already approached this technique in our first article and just in the case you want to know more, simply visit these pages. At line 7 we chain our pipe to the current value of alias, which is bound to the value we type in via the above input field. As you may know the pipe symbol is nothing new as it has already existed in medieval computing times, that is: in the 60es/70es when Unix operating system was just a private hack of some guys from the failed Multics project. Even the name Unix was just a joke related to the Multics project, which was planned to be a “multi-user time sharing” system. Whatever, it’s not important to know anything about it, but just in the case you want to brag about it at your next Linux-Lovers-Meetup. Now, on every keystroke the current value of alias will be forwarded to the Pipe that’ll execute its transform method. Inside of it the regular expression will be used to check if we’ve provided a valid emoji-alias. If this is the case an API-call will be executed an the emoji-symbol will be returned and shown on the page. That’s it. You’ve just created a working emoji-pipe! 😎
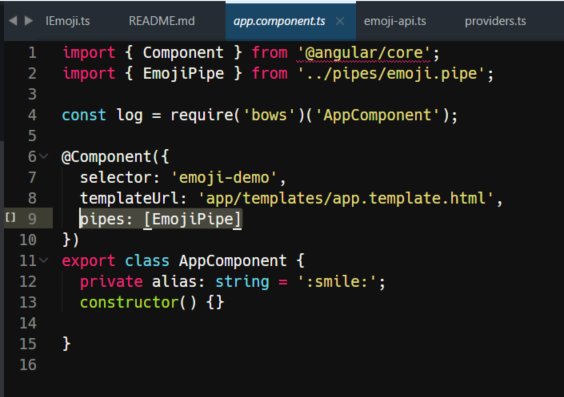
To activate the usage of our Emoji-Pipe we let the AppComponent reference it in its pipes-Array:
Conclusion
Pipes are a very powerful concept and in this article we’ve only covered a very simple usage of a single pipe that consumes a certain type of value and returns another one. But Pipes can do much more. For example, we can chain them together so the output of one pipe becomes input of another. They can also be parametrized, asynchronous or “impure”. Certainly, pipes will become standard tools in any serous project because flexible handling of data and chaining of such flows are something no professional developer can ignore, regardless if you’re developing frontend UIs or backend logic.


