
5 minutes read
This is the third article from the series on using Keycloak. While previous ones were dealing with running Keycloak in Kubernetes this one is about templating Keycloak. Therefore, I won’t be describing how a Keycloak instance can be run and what configuration options one should use. Instead, I will focus on building an easy to use environment for templating and designing Keycloak forms. The environment presented here is the same I am using for my professional work. So, everything shown here is based on real-world experience. This should not mean that it’s the “best” one. I am only sharing my experiences with everyone interested in templating Keycloak.
As usual, all sources are available on GitHub.

As probably many of you know, Keycloak forms are very flexible and can be templated easily. The default templating engine used by Keycloak is FreeMarker but there are alternatives available that run on Angular, React, Vue and many other frontends. I won’t be dictating what template engine you should use, so anything you prefer can be integrated easily. There are a few things to keep in mind, however, like the “themes” volume mounted in Docker, but everything else can be swapped out. I will showcase two test web-apps, one based on Angular and the other built with HTML and a simple script. Feel free to replace them with your own.
So, without further ado, let’s talk about the services that run in Docker.
Services

They are defined in docker-compose.yaml and run these containers:
- Keycloak
- PostgreSQL
- Web Container
- MailDev
- Watcher
- CertSetup
The Keycloak instance is running in production mode and has some extra flags applied to it.
- –https-* flags configure the SSL certificates and keystore so that the instance can run in production mode. Without them Keycloak would refuse to start. An alternative could be the start-dev option without using any certs and keystore, but I prefer to run Keycloak in a more realistic fashion.
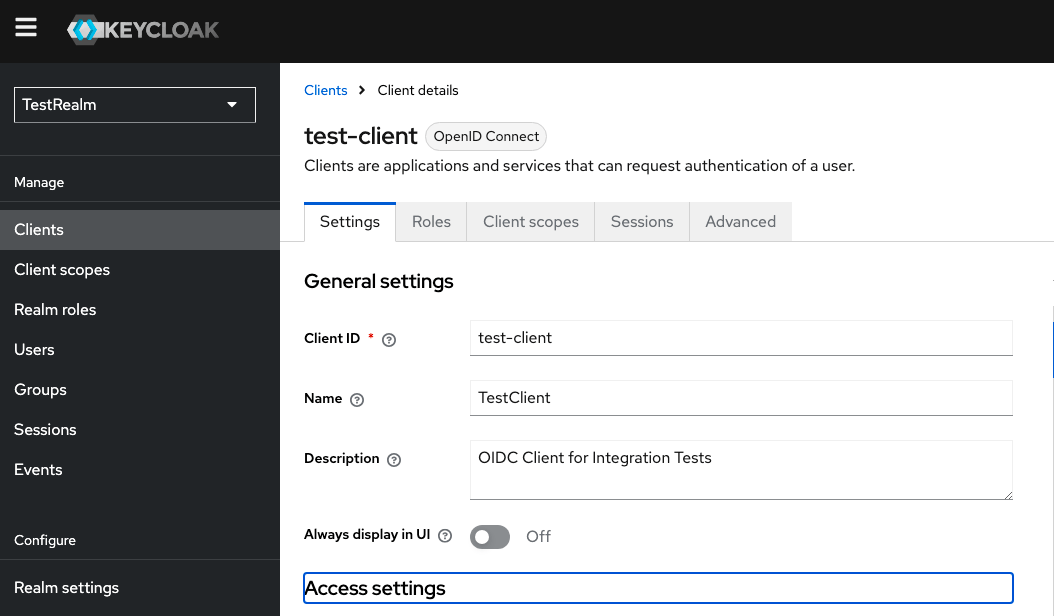
- –import-realm flag loads test-realm.json from import folder to setup “test-realm”. This realm will be used throughout the article. You can of course create your own by providing a new JSON.
- –spi-* flags are used to prevent template caching. These settings make template changes immediately visible as shown below.

PostgreSQL
The PostgreSQL instance serves as Keycloak’s persistence mechanism and should not be manipulated directly. Just let Keycloak take care of it.
MailDev
Another important component is MailDev, a local SMTP server for mimicking mail delivery. This is very useful when testing Keycloak’s “forgot password” forms which expect users to react to confirmation emails. MailDev is configured to listen on port 25 but you can change it easily in docker-compose.yaml:
MailDev offers a nice UI that can be accessed on port 1080 as shown below.

Here is an example of the forgot-password feature from Keycloak that uses MailDev.

Web Apps
There are two web apps available for testing the authentication. One is based on Angular and is a true web app while the other is a spartan HTML page that loads two scripts:
- Keycloak’s
keycloak.jsthat is used to initialize the Keycloak client - A custom script that uses the client to communicate with Keycloak server
Both apps communicate the same way with Keycloak. You can also ignore them both an hook up your own into the environment. Just start docker compose services without referencing any profile:
docker compose up -d
To use Angular app:
docker compose --profile angular up -d
For HTML page:
docker compose --profile web-simple up -d
Angular web app looks like this:
The HTML page is a bit simpler of course:
The script used in the HTML page configures the Keycloak client and then updates the UI according to user’s authentication state. Plain old JavaScript code playing with a few selectors.
Angular application uses keycloak-angular package to protect its routes. In app.module.ts we define the factory function initializeKeycloak. This will then be used to declare the Keycloak provider.
To prevent unauthorized access to routes with Keycloak we define a guard of type KeycloakAuthGuard.
And then use it to protect the profile route:
Watcher
Having an environment that is capable of loading new themes automatically is a plus, but Keycloak loads themes only once at start. That’s why we need to introduce a Watcher container that will be polling the state of the “themes” folder which is mapped to Keycloak’s themes folder as shown below.
The shell script for watching over “themes” folder is very simple. It checks every 10 seconds for any top-level changes.
Whenever a new subfolder is added to themes the Watcher instance will restart the Keycloak instance. This operation can slightly influence Keycloak’s responsiveness and you might even experience “error 404” because Keycloak needs a few moments to come back up. But this is acceptable, I think, because otherwise you’d have to do everything manually.

CertSetup
CertSetup is the only container that isn’t running continuously. Instead, it runs only once during the initial start of the environment. Its sole task is to create certificates and keystore that will be made accessible to Keycloak through “https” volume.
Its service definition in docker-compose.yaml looks a bit convoluted but it’s pretty straightforward:
- Install openssl and openjdk
- Create TLS cert and key with openssl
- Export certificates to a PKCS12 Keystore
- Use keytool from JDK to import PKCS12 into a JKS Keystore
Keystore and certificates will then be referenced by Keycloak.
You can change the certificate contents by editing certificate.cnf.
This is everything we need to run a fully functional Keycloak Templating Environment.
You can now open your favorite editor and change some parts of your template. You will see the changes getting applied immediately.
Happy templating!


