
12 minutes read
This is a follow-up to my previous article on how to setup a Keycloak instance with Postgres on k8s. Surprisingly, it was quite popular on HackerNews and received lots of comments.

Among them were questions regarding high-availability and failure resistance.


In the original article I described a fairly simple setup running Keycloak and Postgres pods which were accessing manually created PersistenceVolumes and Claims. I showed how to do all that both with handcrafted YAMLs as well as with Helm charts. There is also a repository containing YAMLs and configurations, so before you start working with the solution described here, maybe try the simpler one first. A small DevOps tool box I’m using when experimenting with k8s can be found here. There is also an image of it on Docker hub. But you can of course use your own DevOps tools, because everything here is just a bunch of YAMLs and a few Helm commands.
What we’ll build?
Our k8s will be running the following deployments:
- Keycloak server
- NGINX Ingress listening on port 443
- Certificate Manager from Jetstack for our (self-signed) certificates
- PostgreSQL-HA running in production mode
We will use Helm to install packages. Our specific settings will be kept in two values-YAMLs for Keycloak respective PostgreSQL-HA. Additionally, we will show how Certificate Managers can be used in more realistic scenarios because self-signed certificates only make sense in dev or test environments.
For those of you who are too impatient to read the whole article, there is also a shell script that deploys everything automatically. This is how you can use it to automate the deployments:
- Clone its repo
- Copy the script to the folder where all the YAMLs are
- Run the script and wait until it completes.
- Finally, open Keycloak’s main page on https://localhost
However, maybe you should read the article first to understand how all these YAMLs work together.
There is also a HOWTO that describes everything from this article in a more condensed way.
Too many Secrets
Our first step will be to create a namespace where our deployments will run.
kubectl create namespace hbr-keycloak
Set this namespace as default for subsequent kubectl commands. In my miniDevOps tool box I’m using kubens for that, but just in case you prefer longer command lines here’s the alternative for you:
kubectl config set-context --current --namespace=hbr-keycloak
Nevertheless, I’ll be using using namespaces explicitly so that those of you who like to execute commands while reading don’t run into weird problems. 😉
We’ll create a few passwords and save them into Secrets. They will be used by:
KEYCLOAK_ADMIN_PASSWORD=$(echo -n "password")

kubectl create secret generic keycloak-admin-password \
--from-literal=password=$KEYCLOAK_ADMIN_PASSWORD \
-n hbr-keycloak
POSTGRES_PASSWORD=$(openssl rand -hex 16 | base64 | tr -d '\n')
REPMGR_PASSWORD=$(openssl rand -hex 16 | base64 | tr -d '\n')
PGPOOL_ADMIN_PASSWORD=$(openssl rand -hex 16 | base64 | tr -d '\n')

kubectl create secret generic postgresql-secret --from-literal=password=$POSTGRES_PASSWORD \
--from-literal=repmgr-password=$REPMGR_PASSWORD \
-n hbr-keycloak

kubectl create secret generic pgpool-secret --from-literal=admin-password=$PGPOOL_ADMIN_PASSWORD \
-n hbr-keycloak
I am using OpenSSL, base64 and tr to generate random passwords, convert them to base64, and then remove trailing newlines. The trailing newline is a particularly annoying problem that should not be underestimated. Just do a simple search on GitHub and you will know what I am talking about.
Also take great care with naming of keys in Secrets because Helm charts will only search for certain predefined keys. If you don’t use the expected names the deployments provided by Helm won’t be able to find them and your pods will be failing with errors like “could not find secret key named password” and similar.
Therefore, either give your keys the names as expected by Helm charts or use alternative key-name-settings in YAMLs to indicate whee the passwords are saved. The settings in question are named like “existingSecretPasswordKey” or “passwordSecretKey“. You will see those in the YAMLs below.
PostgreSQL Deployment
Our second step is the deployment of PostgreSQL-HA Helm package from Bitnami. Let’s add and update their repo.
helm repo add bitnami https://charts.bitnami.com/bitnami
helm repo update
Although Helm packages can be installed by using flags I’d rather recommend creating a values.yaml file to put every important setting in. This is how my postgresql-values.yaml looks like.
Here we see the settings for PostgreSQL, RepMgr, and PgPool. At the end of YAML we activate metrics. In every of those setting there are also resource limits set. This is just to show how one can use them to prevent resource overconsumption. You will certainly have different preferences than I. And as already mentioned, we can see in this YAML that I am using existingSecret to point at my passwords.
Notice: As the keys in those secrets follow the naming schema defined in Helm charts I don’t need to explicitly point at certain key names. In the other YAML, keycloak-values.yaml, which is located further down in the article, you will later see both a Secret and a key introduced so that Helm can select the correct password.
Finally, we execute this Helm command to deploy PostgreSQL-HA is:
helm install postgresql-ha bitnami/postgresql-ha --namespace hbr-keycloak \
-f postgresql-values.yaml
As the deployment takes some time we issue this command to wait for the PgPool to become ready.
kubectl wait --namespace hbr-keycloak --for=condition=ready pod \
--selector=app.kubernetes.io/component=pgpool \
--timeout=90s
After some waiting time you can now check your pods with: kubectl get pods -n hbr-keycloak
You should get a list of pods similar to this one.
NAME                                    READY   STATUS   RESTARTS   AGE
postgresql-ha-pgpool-59b4666988-56xn9   1/1     Running  0          3h5m
postgresql-ha-postgresql-0              2/2     Running  0          3h5m
postgresql-ha-postgresql-1              2/2     Running  0          3h5m
postgresql-ha-postgresql-2              2/2     Running  0          3h5m
Excellent, the high-availability variant of PostgreSQL is now running in your k8s cluster!
Keycloak Deployment
The third in line to be deployed is Keycloak. And just like with PostgreSQL, our trusted deployment tool, Helm, needs some additional information to properly configure it for us. This will be done by using keycloak-values.yaml that contains the following settings:
The most important part is externalDatabase. As we are not using a “normal” Postgres instance that Keycloak chart deploys by default, we have to declare where the database is, which port it uses, and the account data it expects. As we have created Secrets before, we have to point at them and the keys inside. This of course is a bit more complex than using username/password settings but we surely don’t want to put sensitive data into our YAMLs.
Notice: Yes, I know, there is this thing called SealedSecrets which is the proper way of dealing with sensitive data, especially when you’re using GitOps, but I think that this article is complex enough so it is left as an exercise for the reader. And I bet that someone will still complain about missing SealedSecrets. 😉
The setting postgres.enabled=false serves to prevent Helm from installing a PostgreSQL chart, which would be useless in our case. If you don’t set it to false, an additional Postgres pod would appear. Also take into account that externalDatabase settings are mandatory when postgres.enabled=false is set.
The strategy of explicitly pointing at Secret names and keys is used here to select Keycloak administrator’s password. Each time your key name differs from the expected one, you must use settings like these. They differ from chart to chart, so you will need to consult the docs in question.
The only global setting used in this YAML is the storage class for Persistent Volumes which is “standard” in this case. Feel free to change it. Also consult the original values.yaml because I’m not using every available option.
A few more words regarding externalDatabase.host setting. This value depends on the namespace and PostgreSQL installation name given to Helm. The “svc.cluster.local” part of the URI remains the same but everything in front of it depends on your settings. The setup script for automatic installation I mentioned at the beginning of this article uses the same settings as shown here. So, if you change the namespace take care to adapt values in values.yamls for both Keycloak and Postgres. Otherwise, your Keycloak won’t be able to find the Postgres instance.
You can list your services with kubectl get svc -n hbr-keycloak to get the DNS name of the PgPool.
NAME                                 TYPE       CLUSTER-IP
postgresql-ha-pgpool                 ClusterIP  10.96.181.183
postgresql-ha-postgresql             ClusterIP  10.96.62.243
postgresql-ha-postgresql-headless    ClusterIP  None
postgresql-ha-postgresql-metrics     ClusterIP  10.96.3.145
Having said all that, it’s now time to deploy Keycloak!
helm install keycloak bitnami/keycloak --namespace hbr-keycloak \
-f keycloak-values.yaml
We will wait for the instance to become ready:
kubectl wait --namespace hbr-keycloak --for=condition=ready pod \
--selector=app.kubernetes.io/component=keycloak \
--timeout=90s
After a few moments, our list of pods should contain a new Keycloak instance.
NAME                                    READY   STATUS    RESTARTS AGE
keycloak-0                              1/1     Running   0        2h9m
postgresql-ha-pgpool-59b4666988-56xn9   1/1     Running   0        3h5m
postgresql-ha-postgresql-0              2/2     Running   0        3h5m
postgresql-ha-postgresql-1              2/2     Running   0        3h5m
postgresql-ha-postgresql-2              2/2     Running   0        3h5m
Certificate Management
Our next step is to introduce an Ingress to make the deployment accessible. But we don’t want to use HTTP, because it really makes no sense when dealing with Keycloak. Not even in a local deployment! Therefore, we need a realistic way of generating certificates which leads us to another nice Helm chart: cert-manager from Jetstack. With it we can issue certificates automatically which is way better than self-signed certificates. And the integration with our Ingress will be seamless as well. Of course, if you don’t want this additional mechanism, just use create a self-signed certificate instead and point at it in your Ingress YAML. I have provided three simple examples that can be used in a copy/paste fashion. Take one of them and then apply this Ingress YAML.
Don’t forget to adapt the name of the Secret in the YAML or your Ingress won’t be able to find it. Whichever option you use, any of them is better than plain HTTP.
Now let’s continue with a more realistic example and prepare the deployment of cert-manager.
First, create a separate namespace for it.
kubectl create namespace cert-manager
Then add and update Jetstack’s Helm repository.
helm repo add jetstack https://charts.jetstack.io
helm repo update
Install CRDs (Custom Resource Definitions) for cert-manager.
kubectl apply -f https://github.com/cert-manager/cert-manager/releases/download/v1.11.1/cert-manager.crds.yaml
Finally, install the cert-manager chart.
helm install cert-manager jetstack/cert-manager --namespace cert-manager --version v1.11.1
Now, depending on your environment, you can either install a ClusterIssuer that uses real CA’s like Let’s Encrypt or just a local variant that issues self-signed certificates. For real variants you’d need a routable DNS domain, because otherwise Let’s Encrypt and other CA’s wouldn’t issue any certificates to non-routable domains. Below are both YAML variants. Apply one of them with:
kubectl apply -f cluster-issuer.yaml -n cert-manager
Optionally, you can create a Certificate resource to make your self-signed certificates look a bit more realistic.
Apply it with:
kubectl apply -f selfsigned-certificate.yaml -n hbr-keycloak
Ingress Deployment
After we have deployed the cert-manager it’s now time to deploy our Ingress to make Keycloak accessible from outside of the cluster. We’ll use NGINX-Ingress here but you are free to chose any other Ingress instead.
Now, this part depends on the cluster environment you’re running. As said at the beginning, I am using my miniDevOps tool box that runs clusters based on KinD and offers scripts to setup NGINX Ingresses automatically. In case you are using minikube, k3d or any other local k8s cluster, you’ll have to look into their docs on how to setup an Ingress. In any way, you will have to deploy an IngressController first. From now on, I’ll assume that you already have a working one.
Depending on the way you issue certificates your Ingress deployment will use different settings. Here are three variants using:
- ClusterIssuer with Let’s Encrypt in prod
- ClusterIssuer with self-signed certificates
- self-signed certificate saved in a Secret
Apply one of those with:
kubectl apply -f YOUR_INGRESS.yaml -n hbr-keycloak
This was the last mile in our deployment ride. Now open your browser at https://localhost and you should see this page.

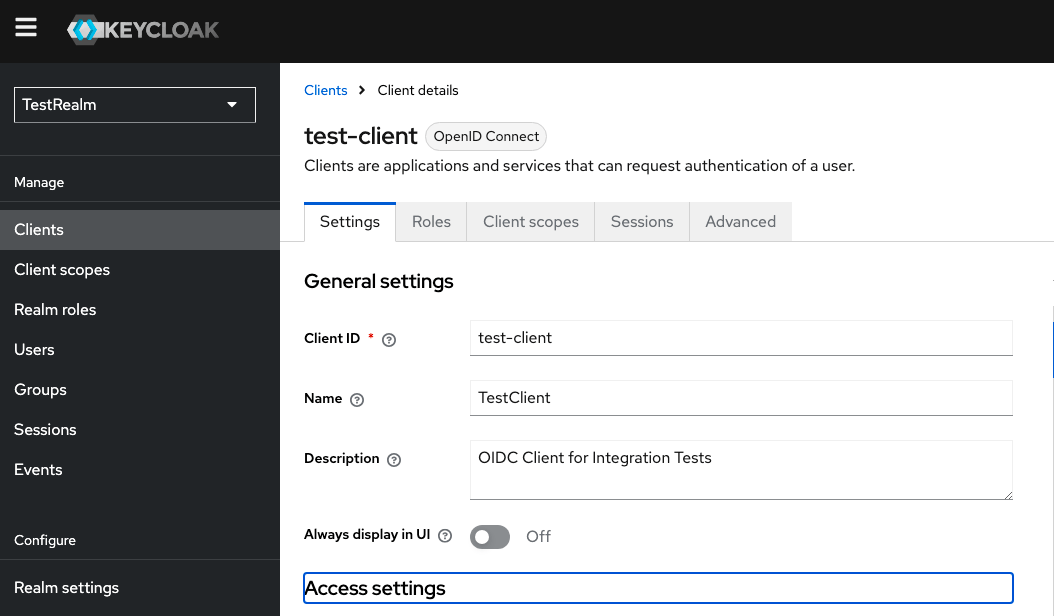
Go to “Administration Console” to open the login form, then type in admin and password you created at the beginning.

Ultimately, you will land in the admin console of Keycloak. Congrats!
Have fun with Keycloak and PostgreSQL!

