15 minutes read
I am writing this article as a kind of follow-up to the previous one where I described a deployment comprising an Angular app, a BFF (backend for frontend) based on Express.js, and a Keycloak server. I won’t go into too much detail as this has been described there already, so if you have found this article first, maybe go to the previous one and then come back. I assure you, things would make much more sense then. But this article is also more than just a follow-up. It’s also a way to correct myself because I described a system that worked well in a local environment without the need to use different domains. And I also wasn’t aware of certain glitches with the usage of my passport-keycloak-strategy library. All this, and a few other things, became very visible when I tried to deploy the three servers in a real environment. I think that writing down these experiences would be of some value to other people, if for nothing else, then at least to save valuable time for those interested in this architectural pattern. But even if you are not using BFF, the knowledge of what could go wrong when dealing with secure session transmission and proper communication with Keycloak is valuable. You also don’t need to read everything top-down as some things might be irrelevant to you. I have used certain operating systems and environments which might not apply to you. Therefore, the most important takeaways from this article might be the ones dealing with session handling and communication between servers as they are based on general protocols (HTTP, OIDC, OAuth2, etc.)
The original repository now contains the latest updates described in this article.
What is to be expected?
As this is based on my work in the last two days, I will try to write directly from memory while using git commits, diffs, and my own notes. The server where I deployed the three components is my private virtual machine that I have been using for years for different things. It’s a Windows Server machine, which brings the whole endeavor to another level because I am not using Apache or Nginx. This might also be of some interest to others as the web is filled with Apache and NGINX tutorials but much fewer with those for IIS. The deployment of the Angular web app with IIS is simple because in compiled form it’s just an index.html with a bunch of JavaScripts and some assets. Much harder is the stuff regarding URL rewrites, X-Forwarding, TLS termination, running Node.js inside IIS, forwarding requests between IIS and Keycloak, and so on. So, all in all, you can expect to read about these problems and their solutions:
- Configuring and running Keycloak behind IIS
- Configuring and running Express.js with (and without) iisnode in IIS
- Writing web.config files for Keycloak, Express.js, and Angular
- Configuring URL Rewrite in IIS for Keycloak and Express.js
- Configuring ARR in IIS
- Fixing cross-domain cookie transmission issues
- Advanced CORS configuration
- Implementing StateStore in KeycloakStrategy
- …and a few other things I don’t remember right now but will maybe later while writing the article
How to run Keycloak behind IIS under Windows Server
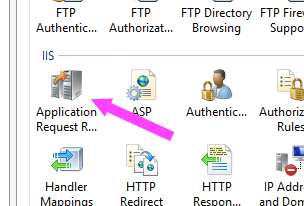
This problem is maybe the least important one for the majority of people out there (I am speculating only, of course). But nevertheless, I still think it’s valuable knowledge as one can never know which web server the next customer (or boss) will prefer. So, to get Keycloak running on a Windows system, which means making it accessible to external parties over an SSL-secured connection, demands a few things. First, you must have URL Rewrite and ARR (Application Request Routing) installed on your Windows machine. If you don’t have them, it’s time to install them now. Then, inside the IIS Management Console, select your server and look for this icon in the list:
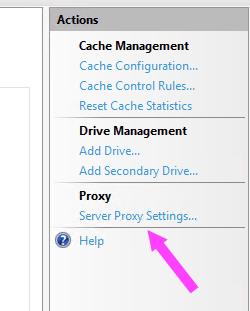
Open it and, in the area to the right, select “Server Proxy Settings”.
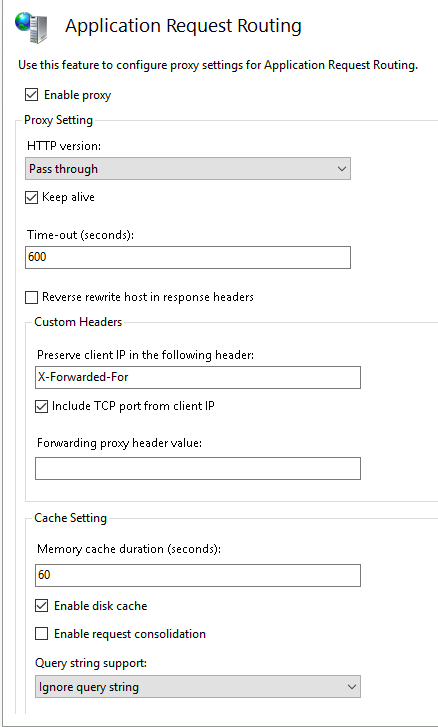
Then make sure you have the same options activated as shown in the screenshot below.
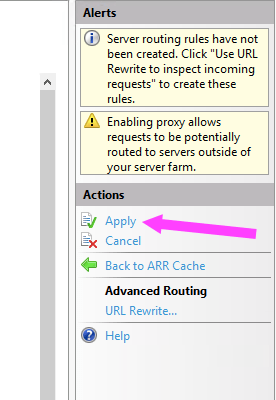
Good, this is all you need to get ARR working. You should now apply the new settings and then exit the module.
Now comes the much harder part because you will have to do two very different things:
- Write keycloak.conf
- Write web.config for the IIS “web application” that will be routing queries to your Keycloak deployment
And before I say anything else, let me say this: web.config is an XML document. Now you can stop reading this article. Otherwise, welcome to the jungle because I could never really understand what options can be inserted there and how they really relate to each other, or if they maybe even influence each other in some bad way. It’s more trial & error than anything else, I admit. But my lamentations aside, this is the web.config that I use to forward queries back and forth.
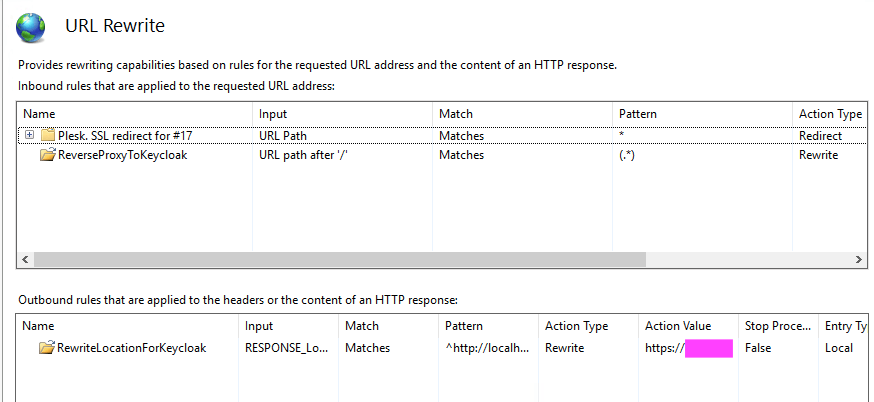
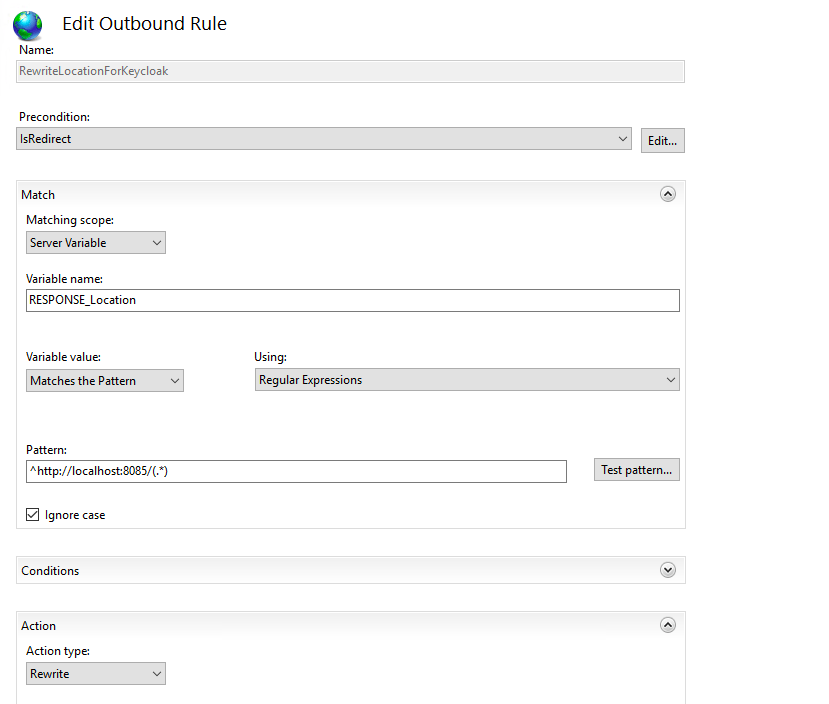
In my case, the Keycloak server is running locally on port 8085 with HTTP only as I am doing TLS termination on IIS. In this setting, the communication comes via HTTPS into the server and then gets switched to HTTP inside the system. But this alone is not sufficient because SSL traffic must be mapped properly between external SSL and internal HTTP-only. That’s why we must forward certain headers as you can see in the web.config above. Without them, there would be no communication between IIS and Keycloak. Also, notice that we first define allowedServerVariables and then, inside the ReverseProxyToKeycloak rule, insert values into these variables. But even this still is not enough because we also need a rewrite rule that maps queries to the external URL to the internal http://localhost:8085 (or whatever you might come up with). This is the task of the RewriteLocationForKeycloak rule. Therefore, we have two rules inside our rewrite segment. But wait a minute, didn’t I mention the URL Rewrite module at the beginning of this article? We saw ARR already, but what happened with the other one? Well, we are configuring it as we type these rules into web.config. This is what we do when we write <rewrite><rule> into it. But you are free to do it manually like this. Again, go back to the IIS Management Console and select the web application representing your Keycloak instance. Then, in the modules list, select “URL Rewrite”…and have fun playing point & click adventures in IIS.
However, I don’t like it and am really not into buttons & clicks these days. I just want to get the job done. So, let’s go to the other configuration file, keycloak.conf, shall we? You will find it under your KEYCLOAK_ROOT/conf/keycloak.conf. Notice that I just downloaded the Keycloak zip file and unpacked it. I do not use anything else. All you need for Keycloak is a JDK (I prefer Adoptium/Temurin) that must be installed for Keycloak to run. The database for Keycloak depends on your preferences, and Keycloak supports many, so you will surely find your preferred one. In my case, I am using Postgres because nothing is better than Postgres. Change my mind!
Because we use TLS termination on IIS, we must use http-enabled=true together with proxy-headers=xforwarded. The older option, proxy=edge, is deprecated and should not be used. That’s it, that’s all for Keycloak. You can now try it out if you can log on via the public URL of your web application.
How to run the BFF behind IIS under Windows Server
The first thing to mention is that you do not need to install iisnode to make IIS aware of your Node application. You can also just fire up a local Node server and let it run the index.js of the BFF. However, if it later crashes, you will need to manually restart it. Therefore, I would recommend using iisnode with IIS. And if you are using server management software like Plesk, you can even install iisnode as an extension and just upload your compiled Node files to the application directory under IIS. However, this is just a hint as there are so many different management solutions. And, of course, you will need another web.config located in the IIS web application representing the BFF. Below is the web.config for a locally run Node server.
In the web.config above, we have only a single rewrite rule that maps the external URL to http://localhost:3000. We use a wildcard to grab all paths and queries from URLs. The variable {R:1} stands for any path or query string that could be appended to the original URL. It’s a simple mechanism:
- Take any path and query
- Append them to http://localhost:3000
- Let ARR act as a reverse proxy so the Node backend can send its responses back
That’s all that is needed for Node.js to run successfully behind IIS. The alternative, iisnode, would need a web.config similar to this one.
Instead of defining the local route, you set the main JavaScript path and forward all paths and queries ({R:1}) to it. This, of course, depends on how you are running the iisnode variant. But in general, all you need is just to forward everything that hits the external URL.
How to run Angular app behind IIS under Windows Server
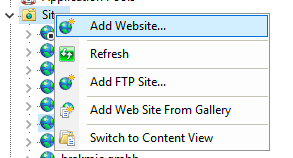
This is the easiest of the three. All you need is to build the app with ng build –aot –optimization and then copy the content of dist/frontend/browser to a new IIS web application that you configured before. To create a new web application, you will go to the IIS Management Console and then right-click “Sites” and select “Add website”.
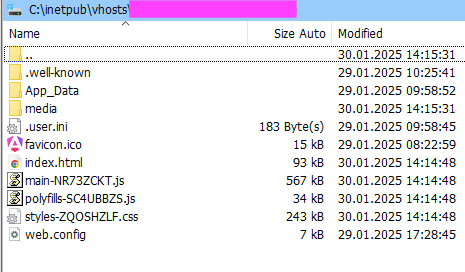
This is how your site folder should look with the Angular app deployed. Of course, there are many ways to automate Angular deployments, so I am showing the final result only.
Will it work?
Nope, it won’t. After I fixed all the problems regarding route rewrites, forwarding, and correct configurations, I was still not able to complete the login procedure. Each time I clicked the “Login” button, the initial Login Form of Keycloak appeared, and I was indeed able to enter my credentials, but the final redirect never succeeded. All I was getting were Error 500s! My first thought was that Keycloak’s Public Client settings might be invalid, but I was wrong. There was nothing problematic. The problem wasn’t even in the app itself but in a library I adopted some time ago (I wrote about it here). One could say that while I was configuring one specific thing, I discovered yet another problem in a completely different package. Well, what was the problem and why did it never appear in the local setup of the same system? The problem was the missing cookie (session) transmission, which could not be achieved when running servers on different subdomains. And to make matters a bit worse, the problem was based on two different things. First, the session configuration lacked the important domain and rolling settings. The domain setting is important to indicate the base domain to ensure cookies are accepted as long as they share the same domain, for example, ‘.your-domain.com‘ (notice the dot at the beginning). As I was running three servers on different subdomains, I needed to set their base domain in session settings. Additionally, I needed to set the sameSite property to ‘none‘ because the previous ‘lax‘ was not tolerant enough. And you must also set secure=true when running with sameSite=’none’ to allow for storing cookies in a cross-domain context. So, I ended up with these settings.
But as I said, the problem was twofold, so I was still running up against the wall, even with the correct session configuration.
Updating KeycloakStrategy Settings
Some time ago, I adopted a useful library originally written in JavaScript. Its main task is providing a Passport.js-compatible KeycloakStrategy for configuring Public and Confidential OIDC Clients. The whole story about it and how to use it can be read here. But, as it always is in life, things hit you the hardest when you merely change a few small things. For example, when you decide to run your services under separate subdomains. Then suddenly, nothing works… No cookies, no sessions, and no completions of login procedures with Keycloak. Without proper setup of the state object, Keycloak could never return the “state” variable in its final callback execution as there was simply no way for the client to verify the data returned by Keycloak’s call. As you already know, we define in the Public Client settings the callbacks that Keycloak can access.

The problem here was that the final call, after the user had entered their credentials, never completed successfully because the returned “state” parameter in the URL was always empty. Because of this, a State Validation Error was thrown. The end result: no session on the BFF’s side could be referenced, thus rendering the whole authentication procedure pointless. The question was: Why is the client sending an empty state object in the initial authorization request?
After some searching, I found out that the req.session and req.oauthState were empty (undefined). To solve the problem, I had to set state=true at the KeycloakStrategy instantiation. This property signals to Passport.js that it should generate a nonce (a random value) and persist it in the session.
If we dig a bit deeper into Passport’s OAuth2Strategy, on which KeycloakStrategy is based, we find a StateStore interface that contains two methods, store and verify. These are used internally to create and later verify the state object.
You can even replace the store object with your own implementation as shown here. It seems to be one of the undocumented objects from Passport.js, if I am correctly informed. But in any case, it’s good to know how things work under the hood. However, this was still not the complete solution as I also had to separate the session initialization (including PKCE initialization) from the actual authentication.
Now, the first URL to be called by the auth.service.ts in the Angular app is /auth/keycloak-init, which subsequently redirects to /auth/keycloak. From this point on, the rest of the authentication flow is the same as before.

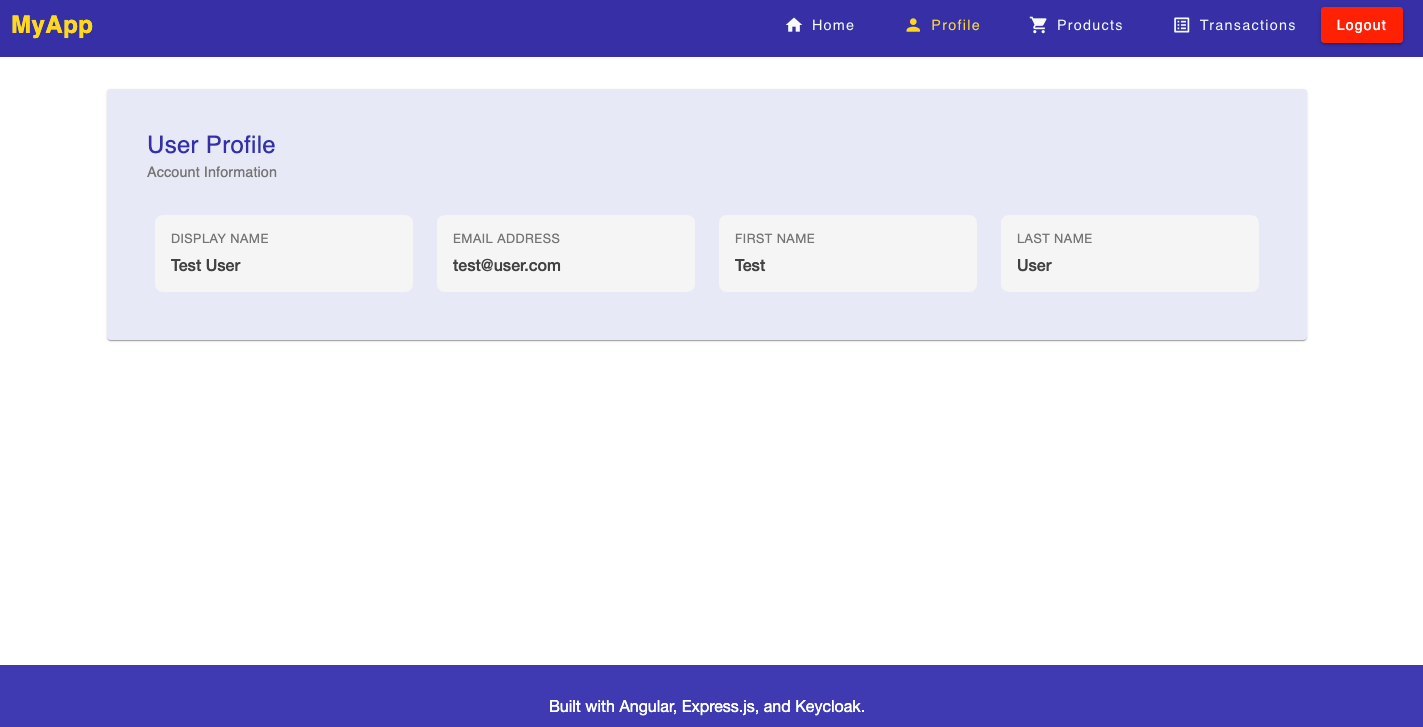
After the successful authorization, we gain access to the user profile, which is served by the BFF’s API.
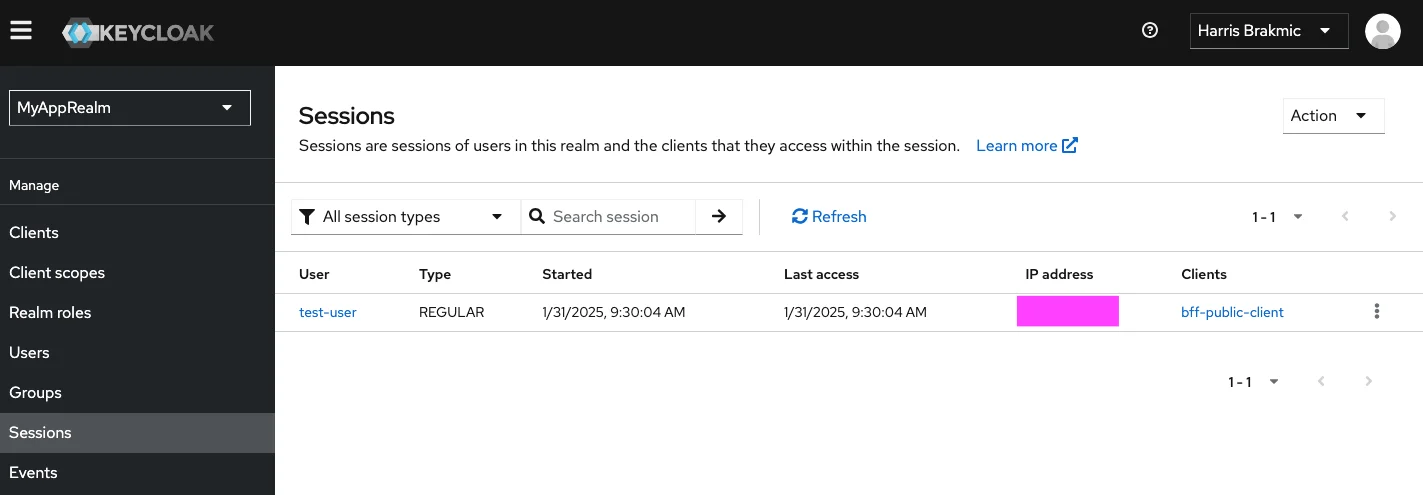
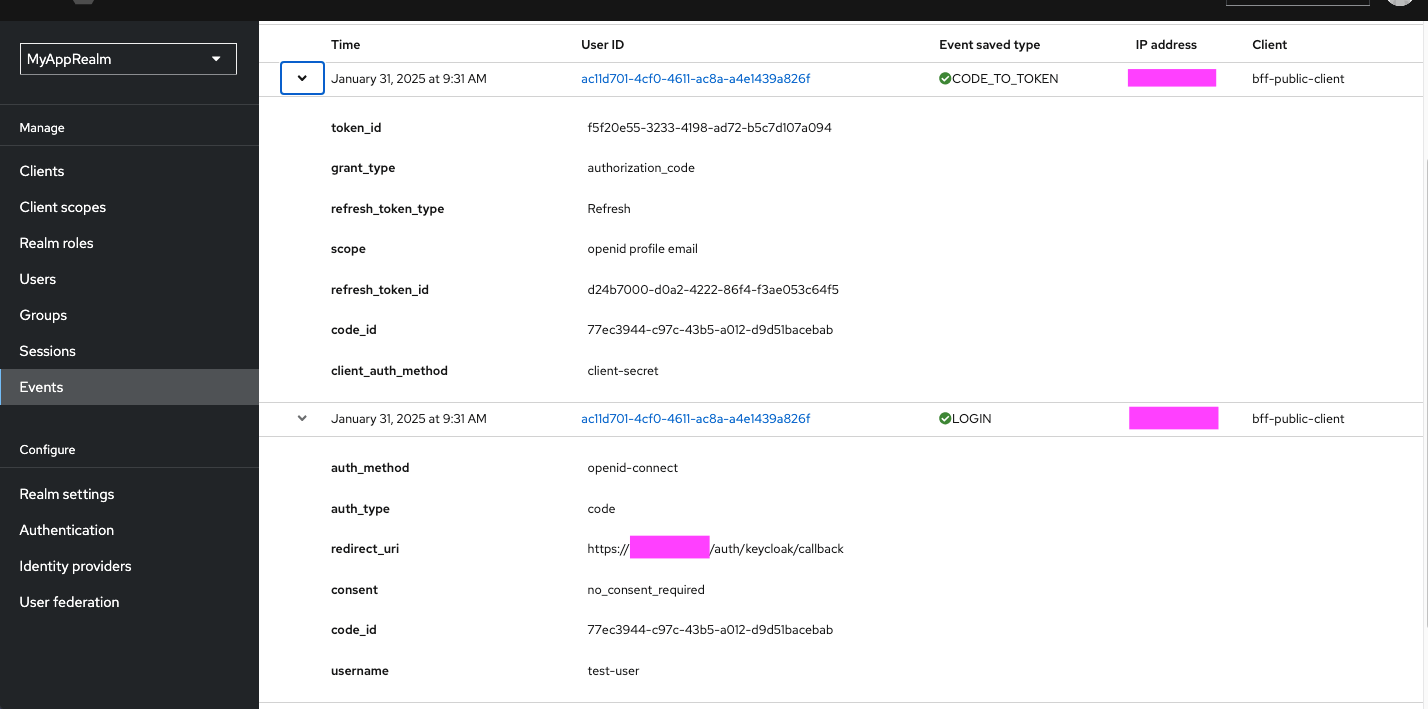
And in the Keycloak Console of the Realm, we can see the session information and the events.
Updating the Angular App
The frontend application remained largely the same. The only real change was the addition of the with-credentials.interceptor.ts that modifies every request by adding the property withCredentials: true. This is needed to allow the use of session cookies in Access-Control requests.
Another change I made, although not related to solving the issues with authentication, is the support of custom AppSettings in app.conf.ts. Originally, this file provided the route definitions, which I have moved to main.ts. The app.config.ts now contains the following definitions.
These settings can then be injected into every component that needs access to the BFF’s API. But this is just a more convenient way for me to manage various deployments. It’s also more a matter of personal taste than a recommendation.
Conclusion
There is no better way to test one’s own ideas than by trying them out in different environments. Easy things become hard, and hard things become interesting. Add to this the lack of knowledge, and you have a… perfect opportunity to learn some new things. Useful things. I have learned a lot and hope that this article will help other people avoid the struggles I had.
Have fun! 🙂

