9 minutes read
In the last year, I have taken over a few npm packages that have been abandoned by their original maintainers. One of them, which I published today, is called passport-keycloak-oauth2-oidc-portable, and is a library that extends the original passport-oauth2 strategy to allow authenticating on Keycloak via OAuth2/OIDC API. One of the reported issues in the original repo was regarding the missing “openid” scope that is mandatory for the “userinfo” field and which became a showstopper for some use cases. So I thought I could take care of this library and also learn a few things along the way. And I did, indeed.
Switching to TypeScript
After fixing the reported errors, I decided to switch the project from JavaScript to TypeScript. Dealing with security-related software and protocols should not be done in JavaScript, even if it’s a small helper library. I understand that many years ago there was no better way of doing things in the browser environment, and I truly respect every developer who has ever maintained a JavaScript project, but these days we have better tools. No need to think about invalid types, confused field names, and similar issues. Additionally, I added integration and e2e tests. And to make it more realistic for local testing, there is also a docker-compose.yml available that sets up a Keycloak instance and imports a test realm that can be used with the library.
Keycloak Test Instance
To start Keycloak, enter pnpm start:keycloak. And to stop it: pnpm stop:keycloak. The docker-compose.yml is pretty straightforward.
It uses keycloak.Dockerfile located in the same directory. At boot, it imports the test-realm that contains a test user and a public client that can be used to showcase the PKCE auth flow.
Proof Key for Code Exchange
By definition, PKCE is an extension of the Authorization Code Flow to prevent CSRF and authorization code injection attacks. Originally, it was developed for mobile clients, but its ability to prevent authorization code injection makes it useful for any type of OAuth2 client. One such client is a typical SPA (single-page application) that users run in their browsers. Such clients can never be fully trusted, and therefore storing any kind of password or other secrets locally should never be done. Instead, a client should always use a more secure auth flow like PKCE. The complete flow is as follows:
- The client (an SPA, for example) wants to access protected resources on a Resource Server.
- The client first generates a code_verifier (a long string value) and derives a code_challenge (a hash value) from it using the SHA256 hash function.
- Then the client redirects the user’s browser to Keycloak’s authorization endpoint (a RESTful API) and provides it with the code_challenge and the code_challenge_method, containing the string “S256” (for SHA256).
- In the opened Keycloak Login Form, the user authenticates by entering their username and password.
- Upon successful authentication, Keycloak redirects the user to the client’s callback URL (which is defined in the client settings in the Keycloak realm the client belongs to).
- The client receives the authorization code as well as the previously stored code_verifier from the session.
- The client then sends a token request to Keycloak’s endpoint, including the authorization code and code_verifier (this is the only time the client would send the privately held code_verifier to another party).
- Keycloak now verifies that the code_verifier matches the code_challenge. This is because hash functions always return the same hash for the same input value. sha256(code_verifier) = code_challenge.
- Keycloak ultimately sends the access token to the client.
- The client can now use the token to access protected resources on the Resource Server.
A Practical Example
Let’s try out PKCE with a demo client, shall we? In the samples folder of the project, you can find the standalone client that we will use to showcase a complete PKCE auth flow with our test Keycloak server. I call this client “standalone” because it contains all the parts needed to go fully through the aforementioned steps. It communicates with Keycloak, it generates keys, it provides the needed callbacks, and ultimately it runs an express server that mimics the Resource Server. Our goal in this case is to reach the “profile” page of the logged-in user. Upon successful authentication, this page will be presented.
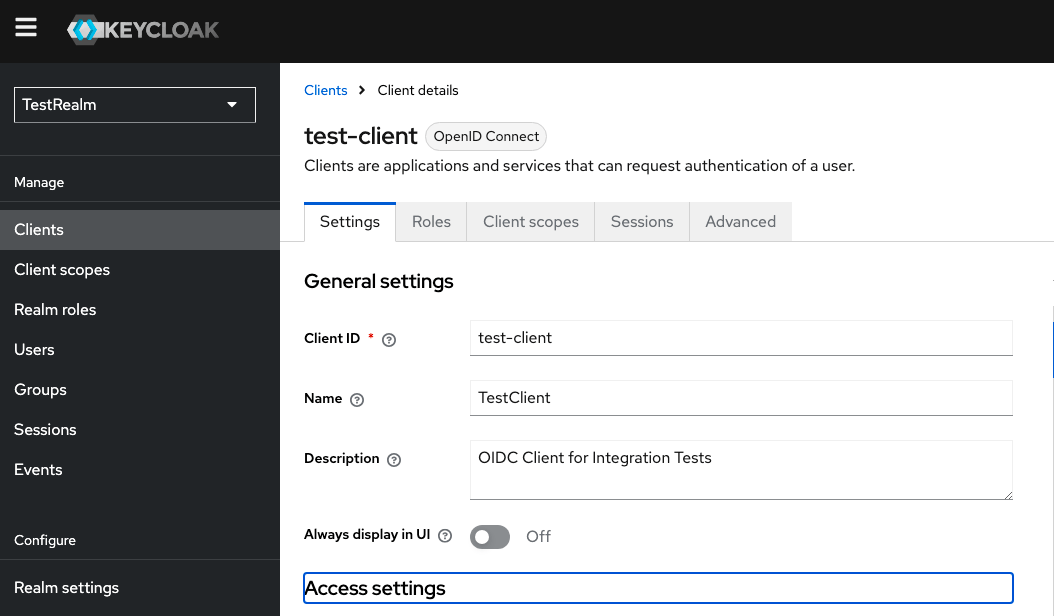
The first step is to make sure your Keycloak instance is running. Just try to open http://localhost:8080. If you see the usual login form, then everything is fine. But you should also check the TestRealm settings. Especially under “Client,” you should see the public-client listed. As the docker-compose.yml that comes with this project automatically imports the TestRealm JSON, there should be no problems; however, a simple check is better than searching for unexplainable errors. After having checked the server, it is time to start the client with:
pnpm start:public-client --authServerUrl http://keycloak:8080 --client test-client --use-pkceOpen http://localhost:3002/auth/keycloak to kick off the PKCE auth flow. This URL will be served by the internal express server running in the standalone client. Ultimately, the Keycloak Login Form will be presented where you should enter “test-user” and “password” to complete it. Upon successful login, the Keycloak instance will redirect you to the resource, which is also being served by the standalone client, and you will get the profile page of the logged-in user presented. Looks simple, doesn’t it? All these steps I mentioned happened within a few milliseconds. But let’s see them in more detail, shall we?
The Building Blocks of the Public Client
First, we need helper functions to generate the code_verifier and the code_challenge.
We then configure our session so that it works in demo environments (HTTP only here). But in production environments, the settings would be much stricter, of course.
We then configure the Passport strategy by instantiating the KeycloakStrategy that was imported from the package.
As we can see in the first configuration block, PKCE is not mandatory as the strategy also supports confidential clients that use client secrets to access protected resources. However, this is a different area, and we won’t be talking about it much here. But you can try it out by adding a new client to the realm and setting its type to “confidential.” You would then supply it with a client secret and use it in the standalone client. If you really want to try this client type, check the demo confidential client I wrote before I switched the project to TypeScript. As of now, I am not actively maintaining this client but may return to it later. Anyway, let’s continue with PKCE. As we can see in the settings above, the client is being populated with the authServerURL that points to Keycloak and the clientID, which is “test-client” in our case. The realm name is also there, as well as further (optional) settings like clientSecret, which we don’t need here and therefore remains empty. The next one in line is the callbackURL that Keycloak will use to redirect the client after a successful login. The three scopes, openid, profile, and email, are mandatory, but we could also add more, depending on our use case. The most important thing, though, is to set publicClient to true; otherwise, the PKCE flow won’t start. The boolean state property instructs the Passport.js library to handle the state internally so we don’t have to deal with the management of hash values and other artifacts. The ultimate goal in this case is to retrieve the user’s profile so that we can display it on the web page later.
What follows is the setup of Passport.js serialization functions and its initialization.
What follows next is the route /auth/keycloak that initiates the authentication with Keycloak.
We see the two helper functions generate code_verifier and code_challenge that will be passed to the Passport.js authentication function. The string value “keycloak” must be passed so that Passport.js can select the correct strategy, in this case the KeycloakStrategy. From this moment on, all PKCE steps will be managed transparently for us, so that in the success case, Keycloak will use this route to redirect the client to.
Depending on the outcome, the client will either reach the protected profile page or be redirected to /login.
That’s it. We successfully completed the PKCE flow. No need to save passwords locally, no need to worry about CSRF attacks, no more headaches for administrators managing various mobile clients. All you need is this small library and an IAM, preferably Keycloak, because there is hardly any better IAM out there, in my humble opinion.
Conclusion
I hope that this article could help you understand PKCE better and what its advantages are. These days, persisting passwords on public clients, which are by default not to be trusted, is not only a bad idea but a disaster waiting to happen. And it will happen, sooner or later. Therefore, I would strongly recommend that every public client, be it a mobile app, an SPA, or an old-fashioned desktop app, immediately gets updated to support PKCE. This is not a question of paranoia but of good software design. And no, I am not telling you to use this library as there are many similar (and surely better) ones out there. What’s important is PKCE regardless of the programming language, runtime, or library one is using.
Have fun with PKCE and Keycloak.


